Working with Google Maps in Android
Posted By : Ravi Sharma | 05-Jul-2013
To use Google Maps in Android there are few steps which must be executed in an sequential order.
Step 1 - Install Google Play services
To use google maps, google play services must be installed which can be done as Window -> Android SDK Manager -> Extras -> Google Play services.
This can take some time depending on your network speed.
Step 2 - Import Google Play services library
This can be done as File -> Import -> Android -> Existing Android Code into Workspace
Then reach the path where your android sdk is installed and traverse to the location : extras/google/google_play_services/libproject/google-play-services_lib.
Make sure in AndroidManifest.xml file the minimum sdk version is 15.
Step 3 - Define library dependency
Whichever project you are using make sure you have provided dependency of library you imported in Step 2.
This can be done as Properties -> Android -> Library, add the google play library from the drop down list.
Step 4 - Get Google Map Api Key
To work with maps, api key is required, The API key will be based on the SHA-1 fingerprint, which you may obtain by typing in command line.
In Linux-
keytool -list -v -keystore ~/.android/debug.keystore -alias androiddebugkey -storepass android -keypass android
In Windows-
keytool -list -v -keystore "C:\Users\your_user_name\.android\debug.keystore" -alias androiddebugkey -storepass android -keypass android
Enter your username in place of your_user_name
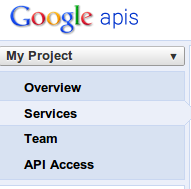
Step 5 - Register with the Google APIs Console
You may reach to console by url : https://code.google.com/apis/console/
Now create your project (if you havent done that before)
Activate the Google Maps Android API v2.

Select API Access on the left-hand-side of the API console. We need key for Android apps.
Near the bottom of the page, select Create new Android key.

Enter the SHA-1 fingerprint you copied from your certificate (with your package name appended) and click Create.
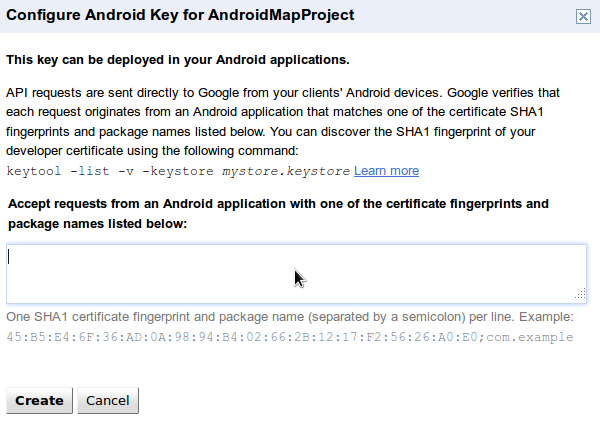
You should get a Api Key
Now we are good to use the google map functionality.
In your AndroidManifest.xml file
Add the Google Maps API key inside the application element,
	<meta-data

	 android:name="com.google.android.maps.v2.API_KEY"

	 android:value="your_key_here" />
Add following permissions in Manifest
	<permission

	    android:name="your.package.name.permission.MAPS_RECEIVE"

	    android:protectionLevel="signature" />

	<uses-permission android:name="your.package.name.permission.MAPS_RECEIVE"/>


	<uses-permission android:name="android.permission.INTERNET" />

	<uses-permission android:name="android.permission.ACCESS_NETWORK_STATE" />

	<uses-permission android:name="android.permission.WRITE_EXTERNAL_STORAGE" />

	<uses-permission android:name="com.google.android.providers.gsf.permission.READ_GSERVICES" />

	<uses-permission android:name="android.permission.ACCESS_COARSE_LOCATION" />

	<uses-permission android:name="android.permission.ACCESS_FINE_LOCATION" />
Finally, we need to add a feature element for OpenGL ES version 2:
<uses-feature
               android:glEsVersion="0x00020000"

		 android:required="true"/>
To main layout add
	<RelativeLayout xmlns:android="http://schemas.android.com/apk/res/android"
         xmlns:tools="http://schemas.android.com/tools"
         android:layout_width="match_parent"
         android:layout_height="match_parent"
         tools:context=".MainActivity" >
         <fragment  android:id="@+id/map"
          android:layout_width="match_parent"
          android:layout_height="match_parent"
          class="com.google.android.gms.maps.MapFragment" />
        </RelativeLayout>
The code is as follows
import com.google.android.gms.maps.CameraUpdateFactory;
import com.google.android.gms.maps.GoogleMap;
import com.google.android.gms.maps.model.LatLng;
import com.google.android.gms.maps.model.Marker;
import com.google.android.gms.maps.MapFragment;
import com.google.android.gms.maps.model.MarkerOptions;
import android.os.Bundle; import android.app.Activity;
import android.view.Window;
public class MainActivity extends Activity {
 LatLng DELHI = new LatLng(28.635308, 77.224960);
 private GoogleMap map;
 @Override
 protected void onCreate(Bundle savedInstanceState) {
 super.onCreate(savedInstanceState);
 this.requestWindowFeature(Window.FEATURE_NO_TITLE);
 setContentView(R.layout.activity_main);
 map = ((MapFragment) getFragmentManager().findFragmentById(R.id.map)).getMap();
 Marker delhi = map.addMarker(new MarkerOptions().position(DELHI));
 map.moveCamera(CameraUpdateFactory.newLatLngZoom(DELHI, 15)); // Zoom in, animating the camera.
 map.animateCamera(CameraUpdateFactory.zoomTo(10), 2000, null);       } }
You pass the latitude , longitude to LatLng constructor.
Refer the map fragment, Use Marker to place the image on map corresponding to latitude, longitude.
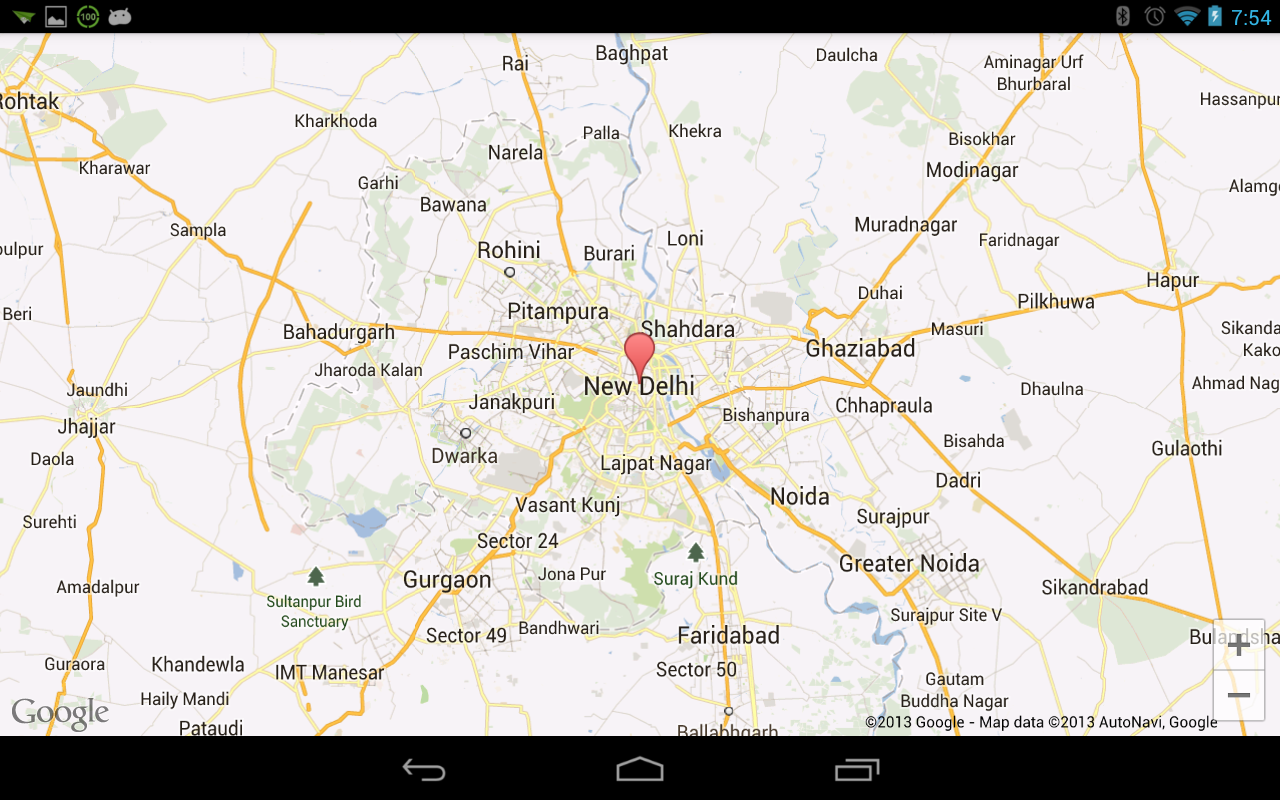
You should see the following output on your device.
Thanks,
Ravi Sharma


Cookies are important to the proper functioning of a site. To improve your experience, we use cookies to remember log-in details and provide secure log-in, collect statistics to optimize site functionality, and deliver content tailored to your interests. Click Agree and Proceed to accept cookies and go directly to the site or click on View Cookie Settings to see detailed descriptions of the types of cookies and choose whether to accept certain cookies while on the site.


About Author
Ravi Sharma
Ravi Sharma is an Android application developer with experience in Java , Titanium and Phonegap frameworks. Ravi loves drawing and PC games.