Integrating Android Paging Library with Multiple View Types
Posted By : Sunidhi Sharma | 15-Jul-2019
Overview:
Android paging library helps us load and display chunks of data at a particular time. In real work use cases, we might have multiple item view types, additional headers or separators between items.
Nonetheless, the paging library works best if you have 1 model type with 1 view type at a time (e.g. PageKeyedDataSource<Int, TaskItem>), model list modification is unsupported because that causes to wrong diffing notifications to recycler view.
The android-architecture-components sample provide a workaround by passing a custom ItemCallback.
new ListUpdateCallback() {
        @Override
        public void onInserted(int position, int count) {
            adapterCallback.onInserted(position + 1, count);
        }
        @Override
        public void onRemoved(int position, int count) {
            adapterCallback.onRemoved(position + 1, count);
        }
        //your code here
    }, config);
While this solution works for simple use cases like adding one header to top of the list or adding a loading item at the bottom. For more complex use cases, this approach becomes error-prone and doesn’t solve the core problem: multiple item view types, not just decoration items but items that represent actual data. Moreover, the number of item types and their order in the list is unknown due to A/B experimental. This post will guide you to use the Paging Library with multiple view types.
Requirement:
1. Android Studio v3 or above.
2. Android Gradle version 3.4 or above.
3. A new Android Project with Kotlin Support.
Let’s start Coding:
Let's see how we can start! This sample project has:
-
Sections (banner, deal, category) representing a trunk of data obtained by different rest API
-
A section might have multiple items (e.g. rest API for category section will have info for 3 blocks: category header, content, and footer)
-
Load one out of a time
-
Support placeholder (loading item) for fixed size list
-
Support infinity list
-
The number of items in the list and their order is unknown until run time
Approaches:
For better readability, we will use a custom view to represent a section. These are just a combination of views using LinearLayout or ConstrainLayout. You can reuse these views anywhere else in your application.
-
BannerView
-
DealView
-
CategoryView
-
SeparatorView
-
LoadingView
E.g.
<?xml version="1.0" encoding="utf-8"?>

<!--this is just LinearLayout-->


<com.example.mvrxpaged.ui.main.view.DealView


xmlns:android="http://schemas.android.com/apk/res/android"


android:orientation="vertical"


android:layout_width="match_parent"


android:layout_height="wrap_content">


<TextView


android:id="@+id/header"


android:padding="48dp"


android:layout_width="wrap_content"


android:layout_height="wrap_content"/>


<TextView


android:id="@+id/content"


android:padding="48dp"


android:layout_width="wrap_content" android:layout_height="wrap_content"/>

</com.example.mvrxpaged.ui.main.view.DealView>
And in your Kotlin File:
class DealView @JvmOverloads constructor(
context: Context,
attributeSet: AttributeSet? = null
) : LinearLayout(context, attributeSet) {
private val contentTextView: TextView by lazy { findViewById<TextView>(R.id.content) }
private val headerTextView: TextView by lazy { findViewById<TextView>(R.id.header) }

fun setContent(value: String) {
contentTextView.text = value
}

fun setHeader(value: String) {
headerTextView.text = "-- DEAL HEADER OF $value ---".toUpperCase()
}

fun setOnClick(onClick: OnClick? = null) {
contentTextView.setOnClickListener(onClick)
}
}
Each of these views will be an ItemView in your RecyclerView. It is good to have a data class that holds presentation data of each of them. To avoid confusion with AAC ViewModel, let's call them ItemViewModel.
interface ItemViewModel {
val id: String // for differentiating stuff
}
class DealView @JvmOverloads constructor(
context: Context,
attributeSet: AttributeSet? = null
) : LinearLayout(context, attributeSet) {
data class Model(
override val id: String,
val content: String,
val onClick: OnClick
) : ItemViewModel
// your code here
}
Now for the data source part, instead of implementing a data source that provides concrete model type like we usually do:
PageKeyedDataSource<Int, DealData>()
We will have a data source that provides ItemViewModel:
PageKeyedDataSource<Int, ItemViewModel>()
Note that in Clean Architecture world, this data source is not a part of the data layer, it belongs to the UI layer, consider it like a controller that helps us in load and paging UI components.
Since we treat each section of the screen as a page, we choose PageKeyedDataSource because we Each page will return an inconsistent number of ItemViewModel due to additional separators that will lead to wrong page calculation. Fortunately for us, the paging library is flexible enough to handle this case. LoadCallback come with a handy parameter called adjacentPageKey that let you pass your own page calculation.
class LoadCallback<Key, Value> {
/**
* your code here
*
* @param adjacentPageKey Key for subsequent page load (previous page in {@link #loadBefore}
* / next page in {@link #loadAfter}), or {@code null} if there are
* no more pages to load in the current load direction.
*/
void onResult(@NonNull List<Value> data, @Nullable Key adjacentPageKey);
}
For the dynamic UI layer problem, we also need to model our view types on the screen:
sealed class MainViewType {

data class Banner(val name: String) : MainViewType()

data class Deal(val code: String) : MainViewType()

data class Category(val code: String) : MainViewType()
}
Then, the UI layer is described in a simple list:
private val layerA = listOf(

MainViewType.Banner("A"),

MainViewType.Deal("1"),

MainViewType.Deal("2"),

MainViewType.Category("1"),

MainViewType.Category("2"),

MainViewType.Category("3")

)

// change view content + layout

private val layerB = listOf(

MainViewType.Banner("B"),

MainViewType.Deal("1"),

MainViewType.Category("1"),

MainViewType.Deal("3"),

MainViewType.Category("5"),

MainViewType.Category("3")

)

// obtain the layer from A/B testing

override fun getMainScreenLayer(): List<MainViewType> {

return if (Random.nextBoolean()) layerA else layerB

}
PageKeyedDataSource<Int, ItemViewModel>() implementation:
-
When you load the first page, you load the URL first.
-
For each page request, check the type of viewType, and load data from the API.
-
Use this information to construct ItemViewHolder list, and invoke paging callbacks with this acquired list.
-
The total item is the sum of Views in the layout plus all addition views (separator, header), this should be equals to the number of ItemViewHolder
-
Next page is always currentPage + 1, pass it in the adjacentPageKey
class MainModelDataSource @Inject constructor(
private val args: MainArgs,
private val getBanner: GetBanner,
private val getCategory: GetCategory,
private val getDeal: GetDeal,
private val getMainLayout: GetMainLayout
) : PageKeyedDataSource<Int, ItemViewModel>() {
private lateinit var layout: List<MainViewType>
private val totalItemCount: Int by lazy {
layout.map { viewType ->
when (viewType) {
is Banner -> 1 + 1 // banner + separator
is Deal -> 1 + 1 // header + separator
is Category -> 1 + 1 // header + separator
}
}.sum()
}
private val totalPage: Int by lazy { layout.size }
override fun loadInitial(params: LoadInitialParams<Int>, callback: LoadInitialCallback<Int, ItemViewModel>) {
layout = getMainLayout()
load(page = 0, loadInitialCallback = callback)
}

override fun loadAfter(params: LoadParams<Int>, callback: LoadCallback<Int, ItemViewModel>) {
load(page = params.key, loadCallback = callback)
}
private fun load(
page: Int,
loadInitialCallback: LoadInitialCallback<Int, ItemViewModel>? = null,
loadCallback: LoadCallback<Int, ItemViewModel>? = null
) {
val nextPage = page + 1
// index goes out of bound

if (page > totalPage - 1) {

// handle infinity list
} else {
val models=when(val viewType=layout[page])
{
is Banner -> loadBanner(viewType.name)
is Deal -> loadDeal(viewType.code)
is Category -> loadCategory(viewType.code)
}
if (args.infinity) {
loadInitialCallback?.onResult(models, null, nextPage)
} else {
loadInitialCallback?.onResult(models, 0, totalItemCount, null, nextPage)
}
loadCallback?.onResult(models, nextPage)
}
}
private fun loadBanner(name: String): List<ItemViewModel> {
return getBanner(name).let { bannerData ->
listOf(
BannerView.Model(
id = "banner ${bannerData.value}",
content = bannerData.value,
onClick = OnClick {
// your code here
}),
SeparatorView.Model(
id = "separator ${bannerData.value}"
)
)
}
}
//your code here

}
RecyclerView.Adapter, there is not much to do here: view inflation, binding, diffing. Put the PagedList in your ViewModel, observe it in your Views, and submit new values to the RecyclerView.
Instead of ItemViewModel, you already have the generated EpoxyModel<*>, the data source is now acting like EpoxyController, In the data source, you construct models using their generated builder. Then use PagedListEpoxyController to handle delivering the EpoxyModel<*>
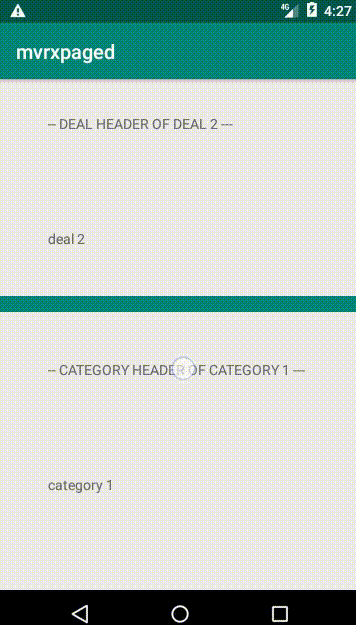
Preview:
Conclusion:
The paging library team indeed did a great job when they design a library that is intended to use at the data layer but turns out to be a powerful tool in the UI layer. By using this example one can load data in small chunks with different APIs, view-loading loading can be replaced with shimmer placeholders.


Cookies are important to the proper functioning of a site. To improve your experience, we use cookies to remember log-in details and provide secure log-in, collect statistics to optimize site functionality, and deliver content tailored to your interests. Click Agree and Proceed to accept cookies and go directly to the site or click on View Cookie Settings to see detailed descriptions of the types of cookies and choose whether to accept certain cookies while on the site.


About Author
Sunidhi Sharma
An ardent computer science enthusiast working in the field of Android application development.