How to Record Test Cases with JMeter and Run it
Posted By : Nargis Khan | 13-Feb-2018
First, we need to understand why we record our test cases. When we test the application then there are lots of test cases for each scenario. To convert test cases into an HTTP request (in JMeter) is very time-consuming. So each request is recorded by the JMeter itself when the proxy server starts.
There are few steps or configuration which has been performed before going to record web application.
1. Install the JMeter into your system.
2. Open the Jmeter. How its Look Like
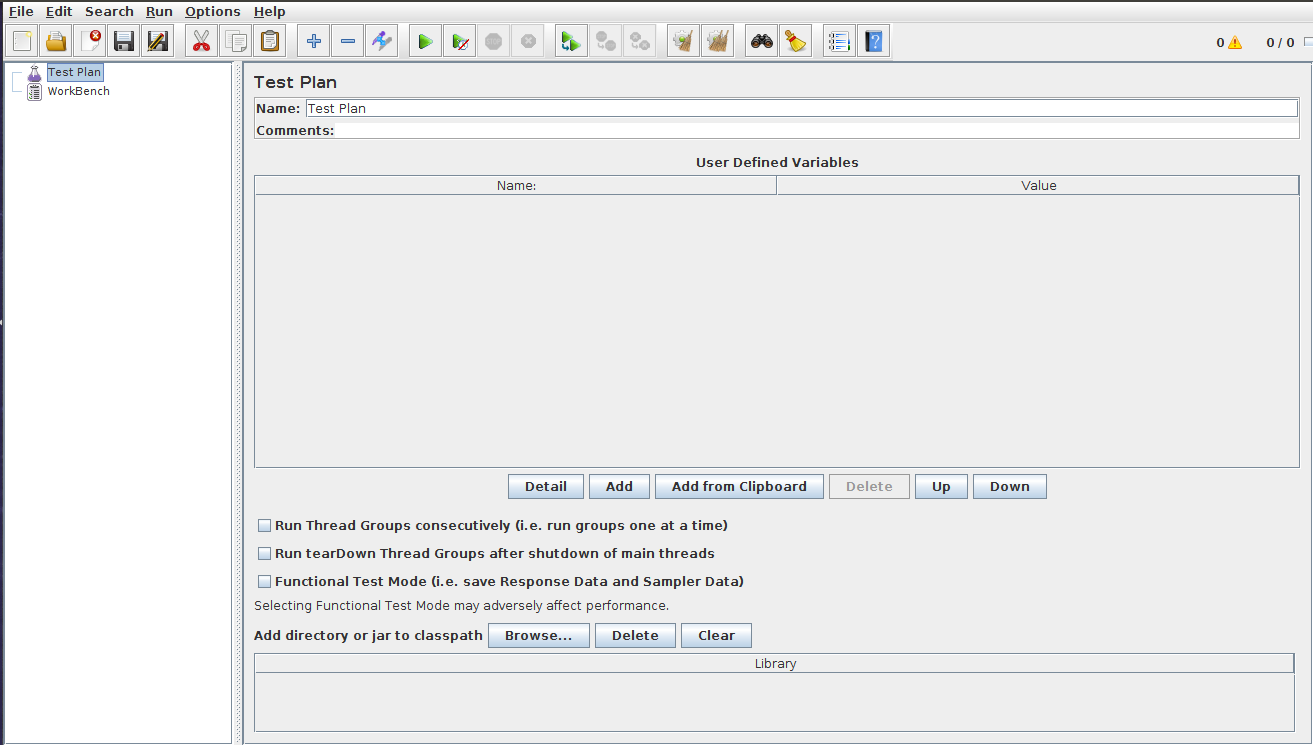
In JMeter, “Test Plan” is a container. It contains all the elements which we needed in the testing.
“Workbench” stored element in a temporary base.
3. Add the Thread Group to the test plan.
Thread Group is known by the "number of users". To add thread group to Test Plan.
a) Right-Click on the Test Plan.
b) Mouse over Add>
c) Mouse over Thread Group(Users)
d) Click on Thread Group
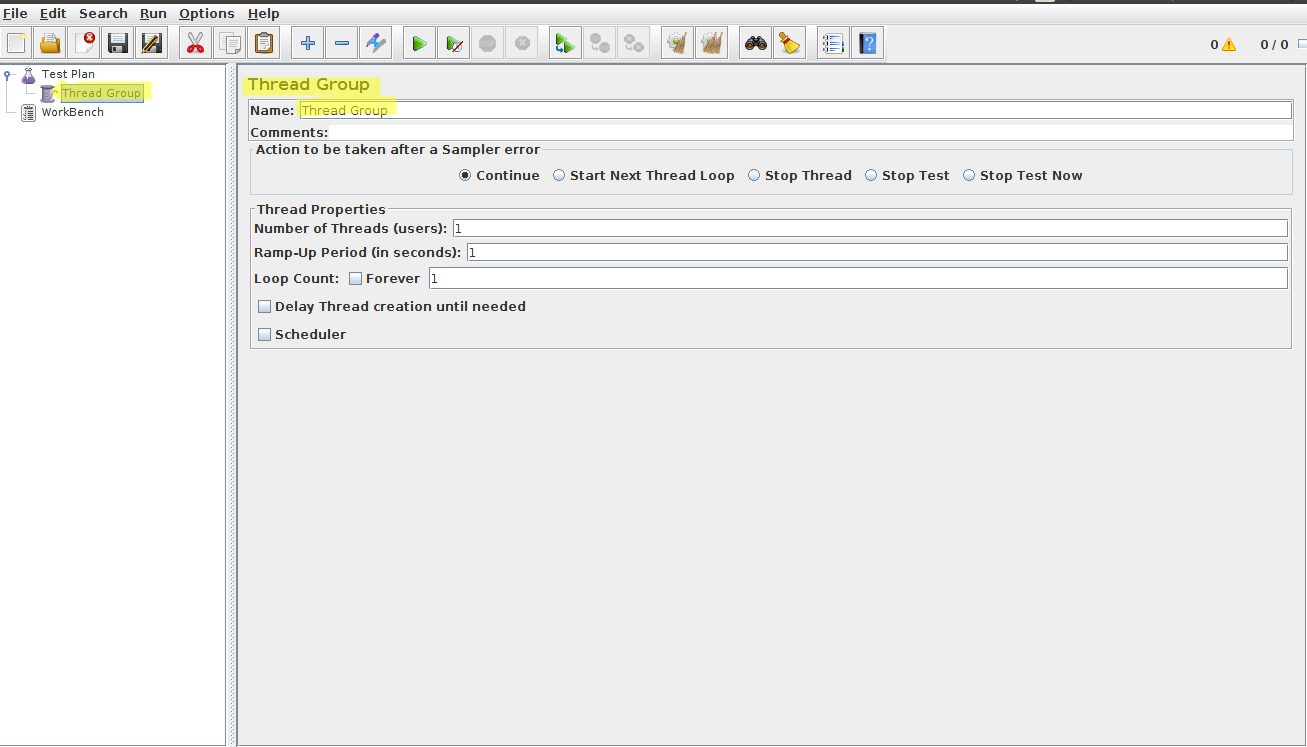
Set the Thread Group properties with the following values
Number of Threads (users): Set this to 100
Ramp-Up Period (in seconds): Set this to 20
Loop Count: Leave this set to 1.
4. Add an HTTP Request Default to Thread group.
a) Select Thread Group, then right-click it
b) Mouse over Add >
c) Mouse over Sampler >
d) Click on HTTP Request Default.
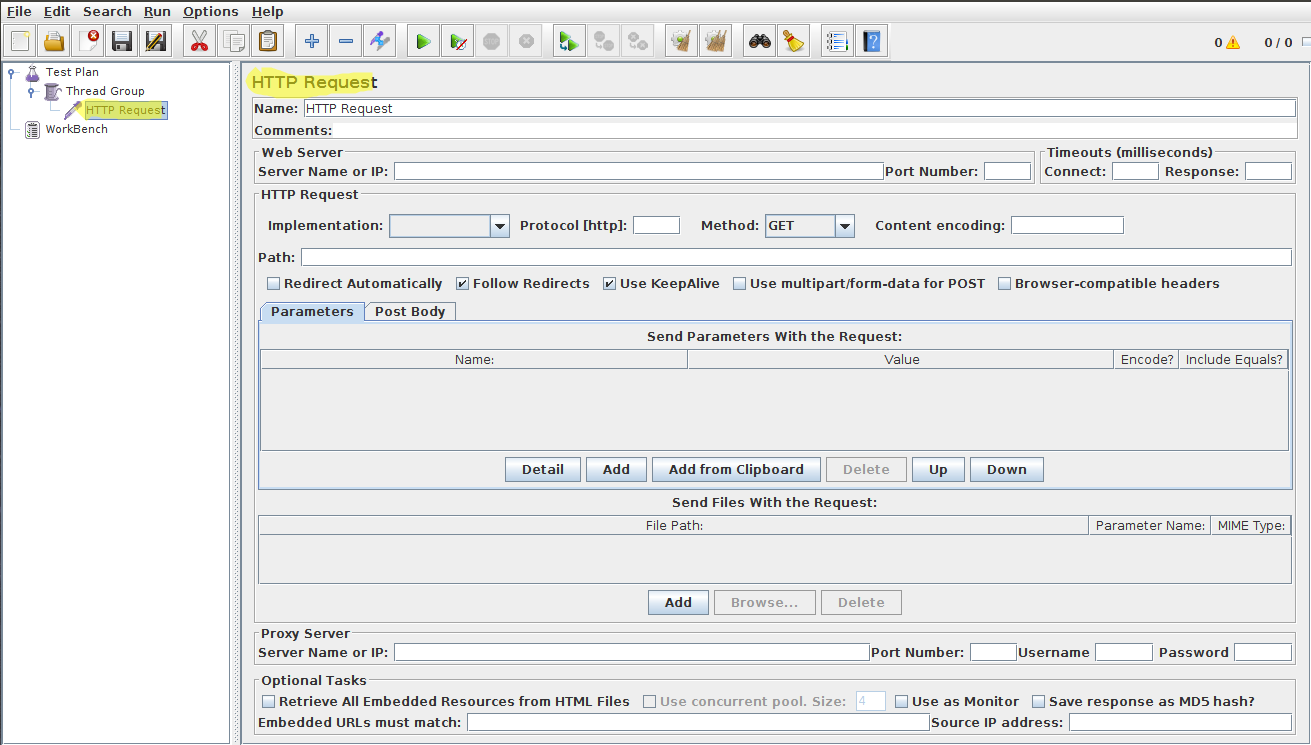
In HTTP Request Defaults, under the Web Server section, fill in the Server Name or IP field with the name or IP address of the web server you want to test. I changed the name of the Http Request Defaults to "log in".
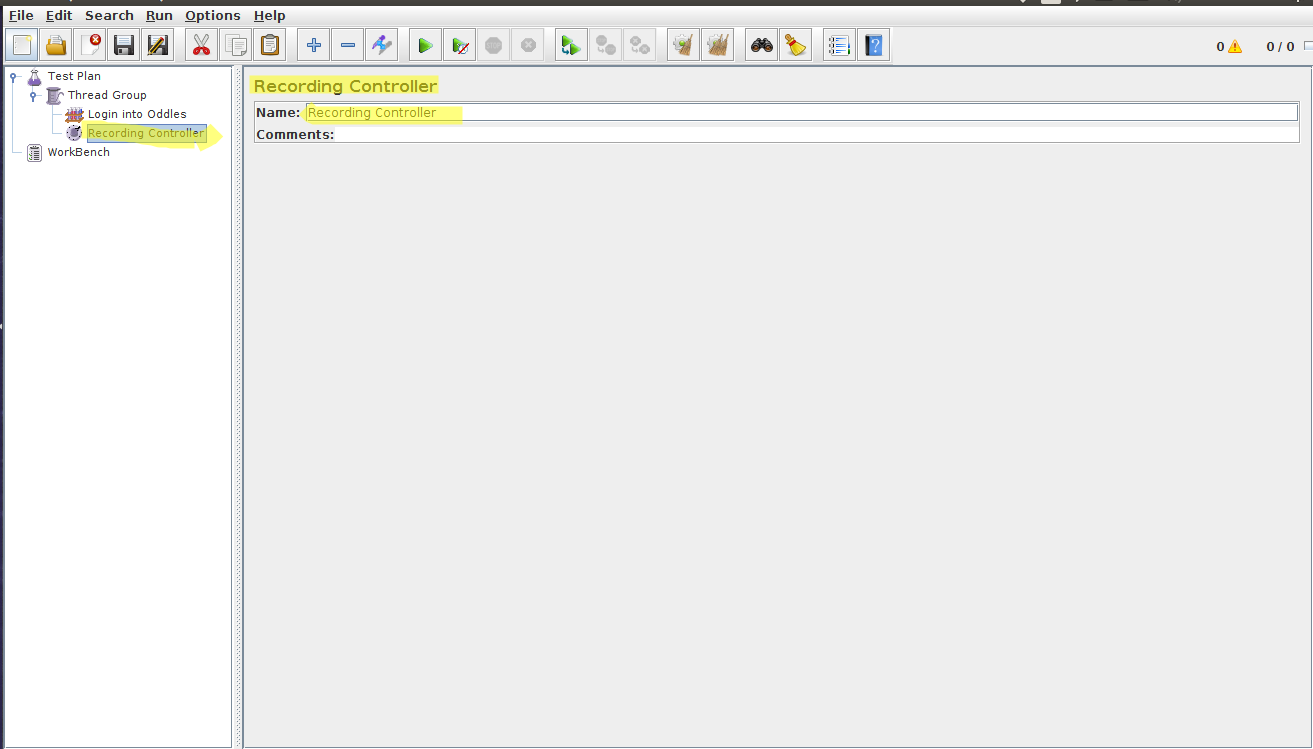
5. Add a Recording Controller
Now let's add a Recording Controller to Thread Group:
a) Select Thread Group, then right-click it
b) Mouse over Add >
c) Mouse over Logic Controller >
d) Click on Recording Controller
6. Add listeners to thread group for reading result for the test case.
a) Select Thread Group, then right-click it
b) Mouse over Add >
c) Mouse over listeners >
d) Click on View result in a tree.

7. Add HTTP(S) Test Script Recorder
Now let's add an HTTP(S) Test Script Recorder to the WorkBench:
a) Select WorkBench, then right-click it
b) Mouse over Add >
c) Mouse over Non-Test Elements >
d) Click on HTTP(S) Test Script Recorder
8. Add listeners to thread group for reading result for a test case.
a) Select Workbench, then right-click it
b) Mouse over Add >
c) Mouse over listeners >
d) Click on View result in a tree.
Now very important step set the proxy of a web browser.
-> Open the Browser
-> Go to setting/preferences.
-> Open the network setting.
-> Click Manual proxy configuration.

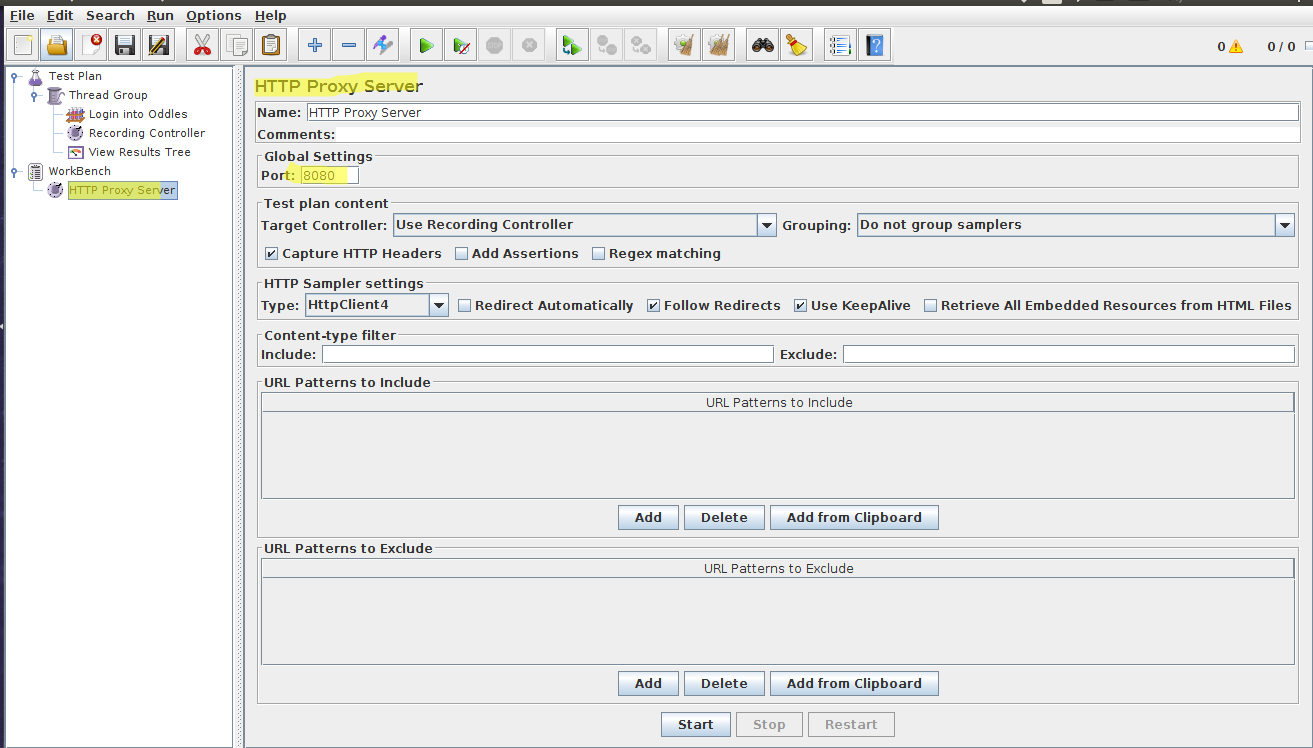
By default, the localhost and port number 8080 is set globally. We will set as it is.
a) Click “OK” Restart the Firefox.
b) Start the Recording of the web application
c) Go to the Http Proxy Server and Start the server by click on the “start” button at the bottom of the screen.
d) Now go to Mozilla Firefox and Perform the testing.
e) Go to Jmeter-> Recording Controlling. As you can easily see our steps record in the Jmeter.
f) Stop the Proxy server.
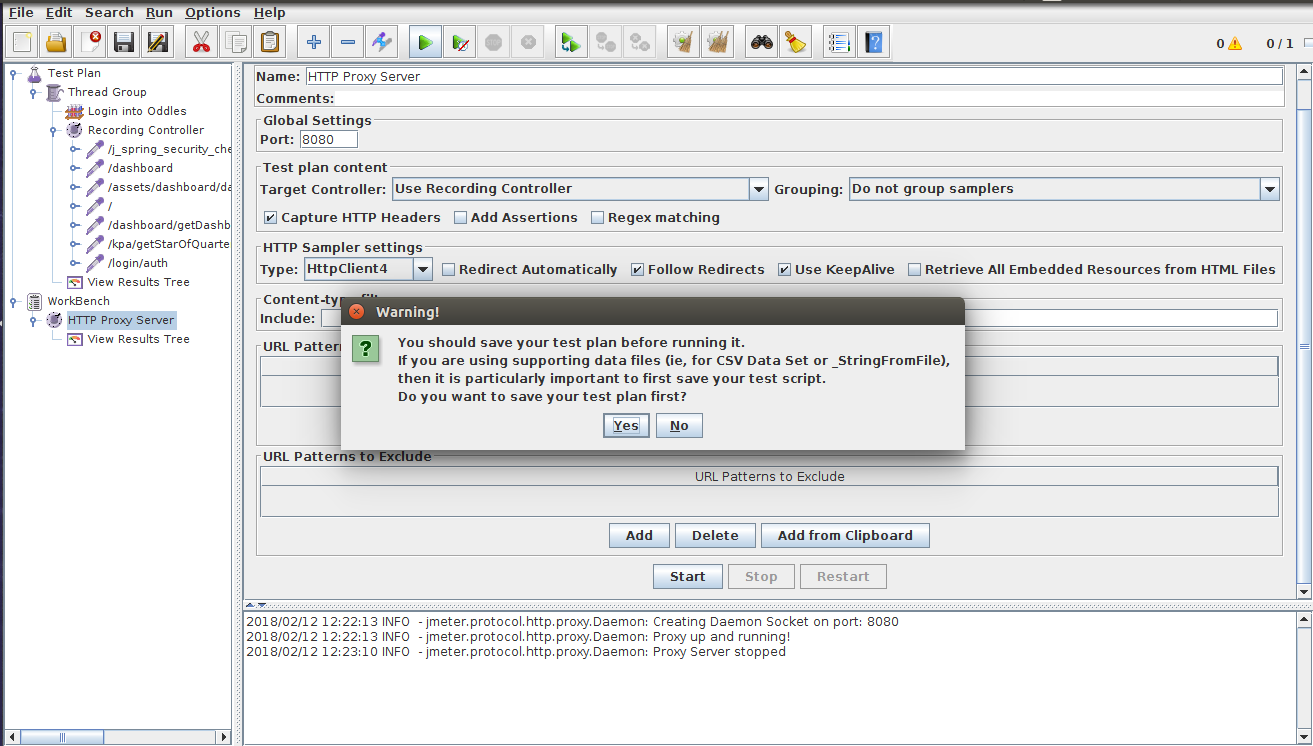
g)Click on the Run button Or Green Arrow on the Top of the screen.It asks to save test plan for further use. Click “Yes” And save the test plan.
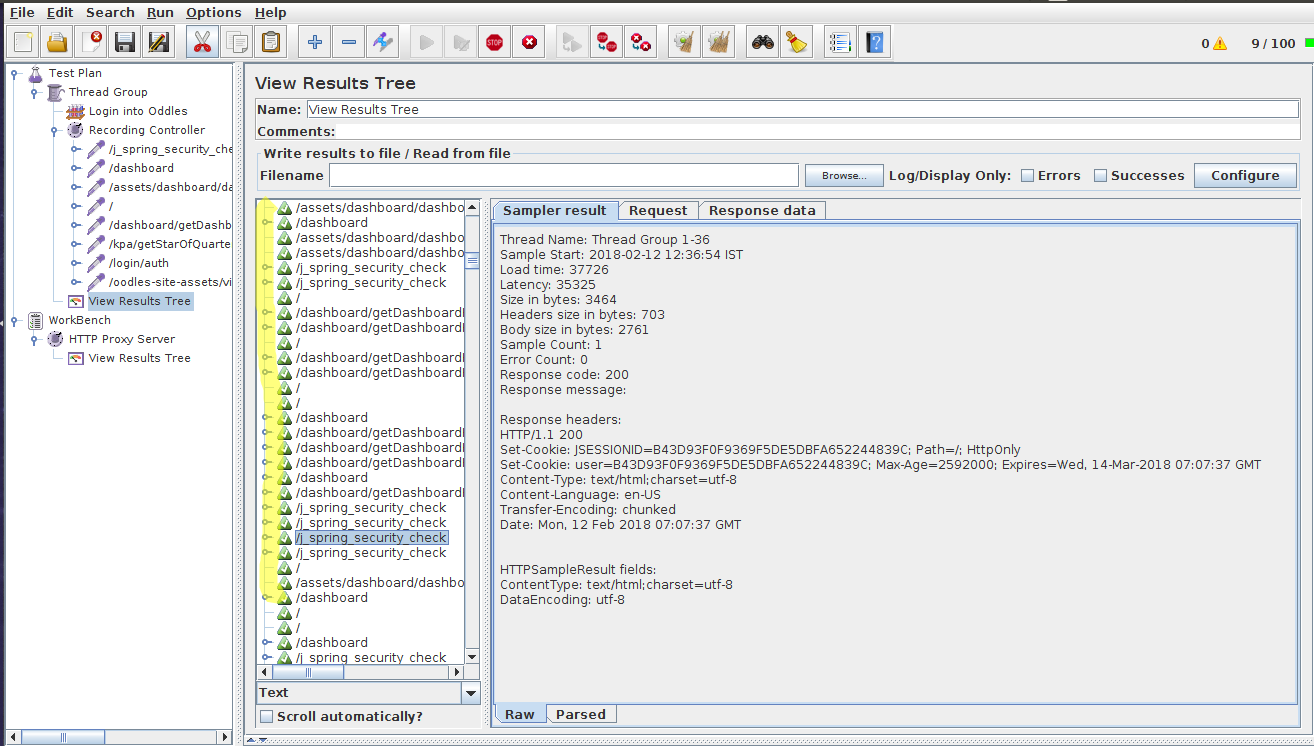
f) After that, you can see the result in to “View result into Tree”. If the recorded script appears in green color then test case is passed. If it comes into red then fail.
Thanks


Cookies are important to the proper functioning of a site. To improve your experience, we use cookies to remember log-in details and provide secure log-in, collect statistics to optimize site functionality, and deliver content tailored to your interests. Click Agree and Proceed to accept cookies and go directly to the site or click on View Cookie Settings to see detailed descriptions of the types of cookies and choose whether to accept certain cookies while on the site.


About Author
Nargis Khan
Nargis is certified in Manual Testing , she has done B.Tech in computer science. Her Hobbies are reading books & listening music.