Creating a Input Widget in NETGEM STB SDK
Posted By : Gaurav Tiwari | 06-Feb-2014
In this blog I will explain how to make an input widget to take input and pressing the key to further action for NETGEM Set Top Box SDK
we need to create the html file such as index.html
When we start the application ,there is NGM.application.start() method call.it start the application and initiate the main form.
Then onEnter method called. We set the data in infopanel of the application. and copy the following code into in MyFormWidget.js
var widgets = this.widgets,// to access the widgets from the json.
infoPanel = widgets.infoPanel,
inputLabel = widgets.inputLabel,
input = widgets.input,
infoData = [];
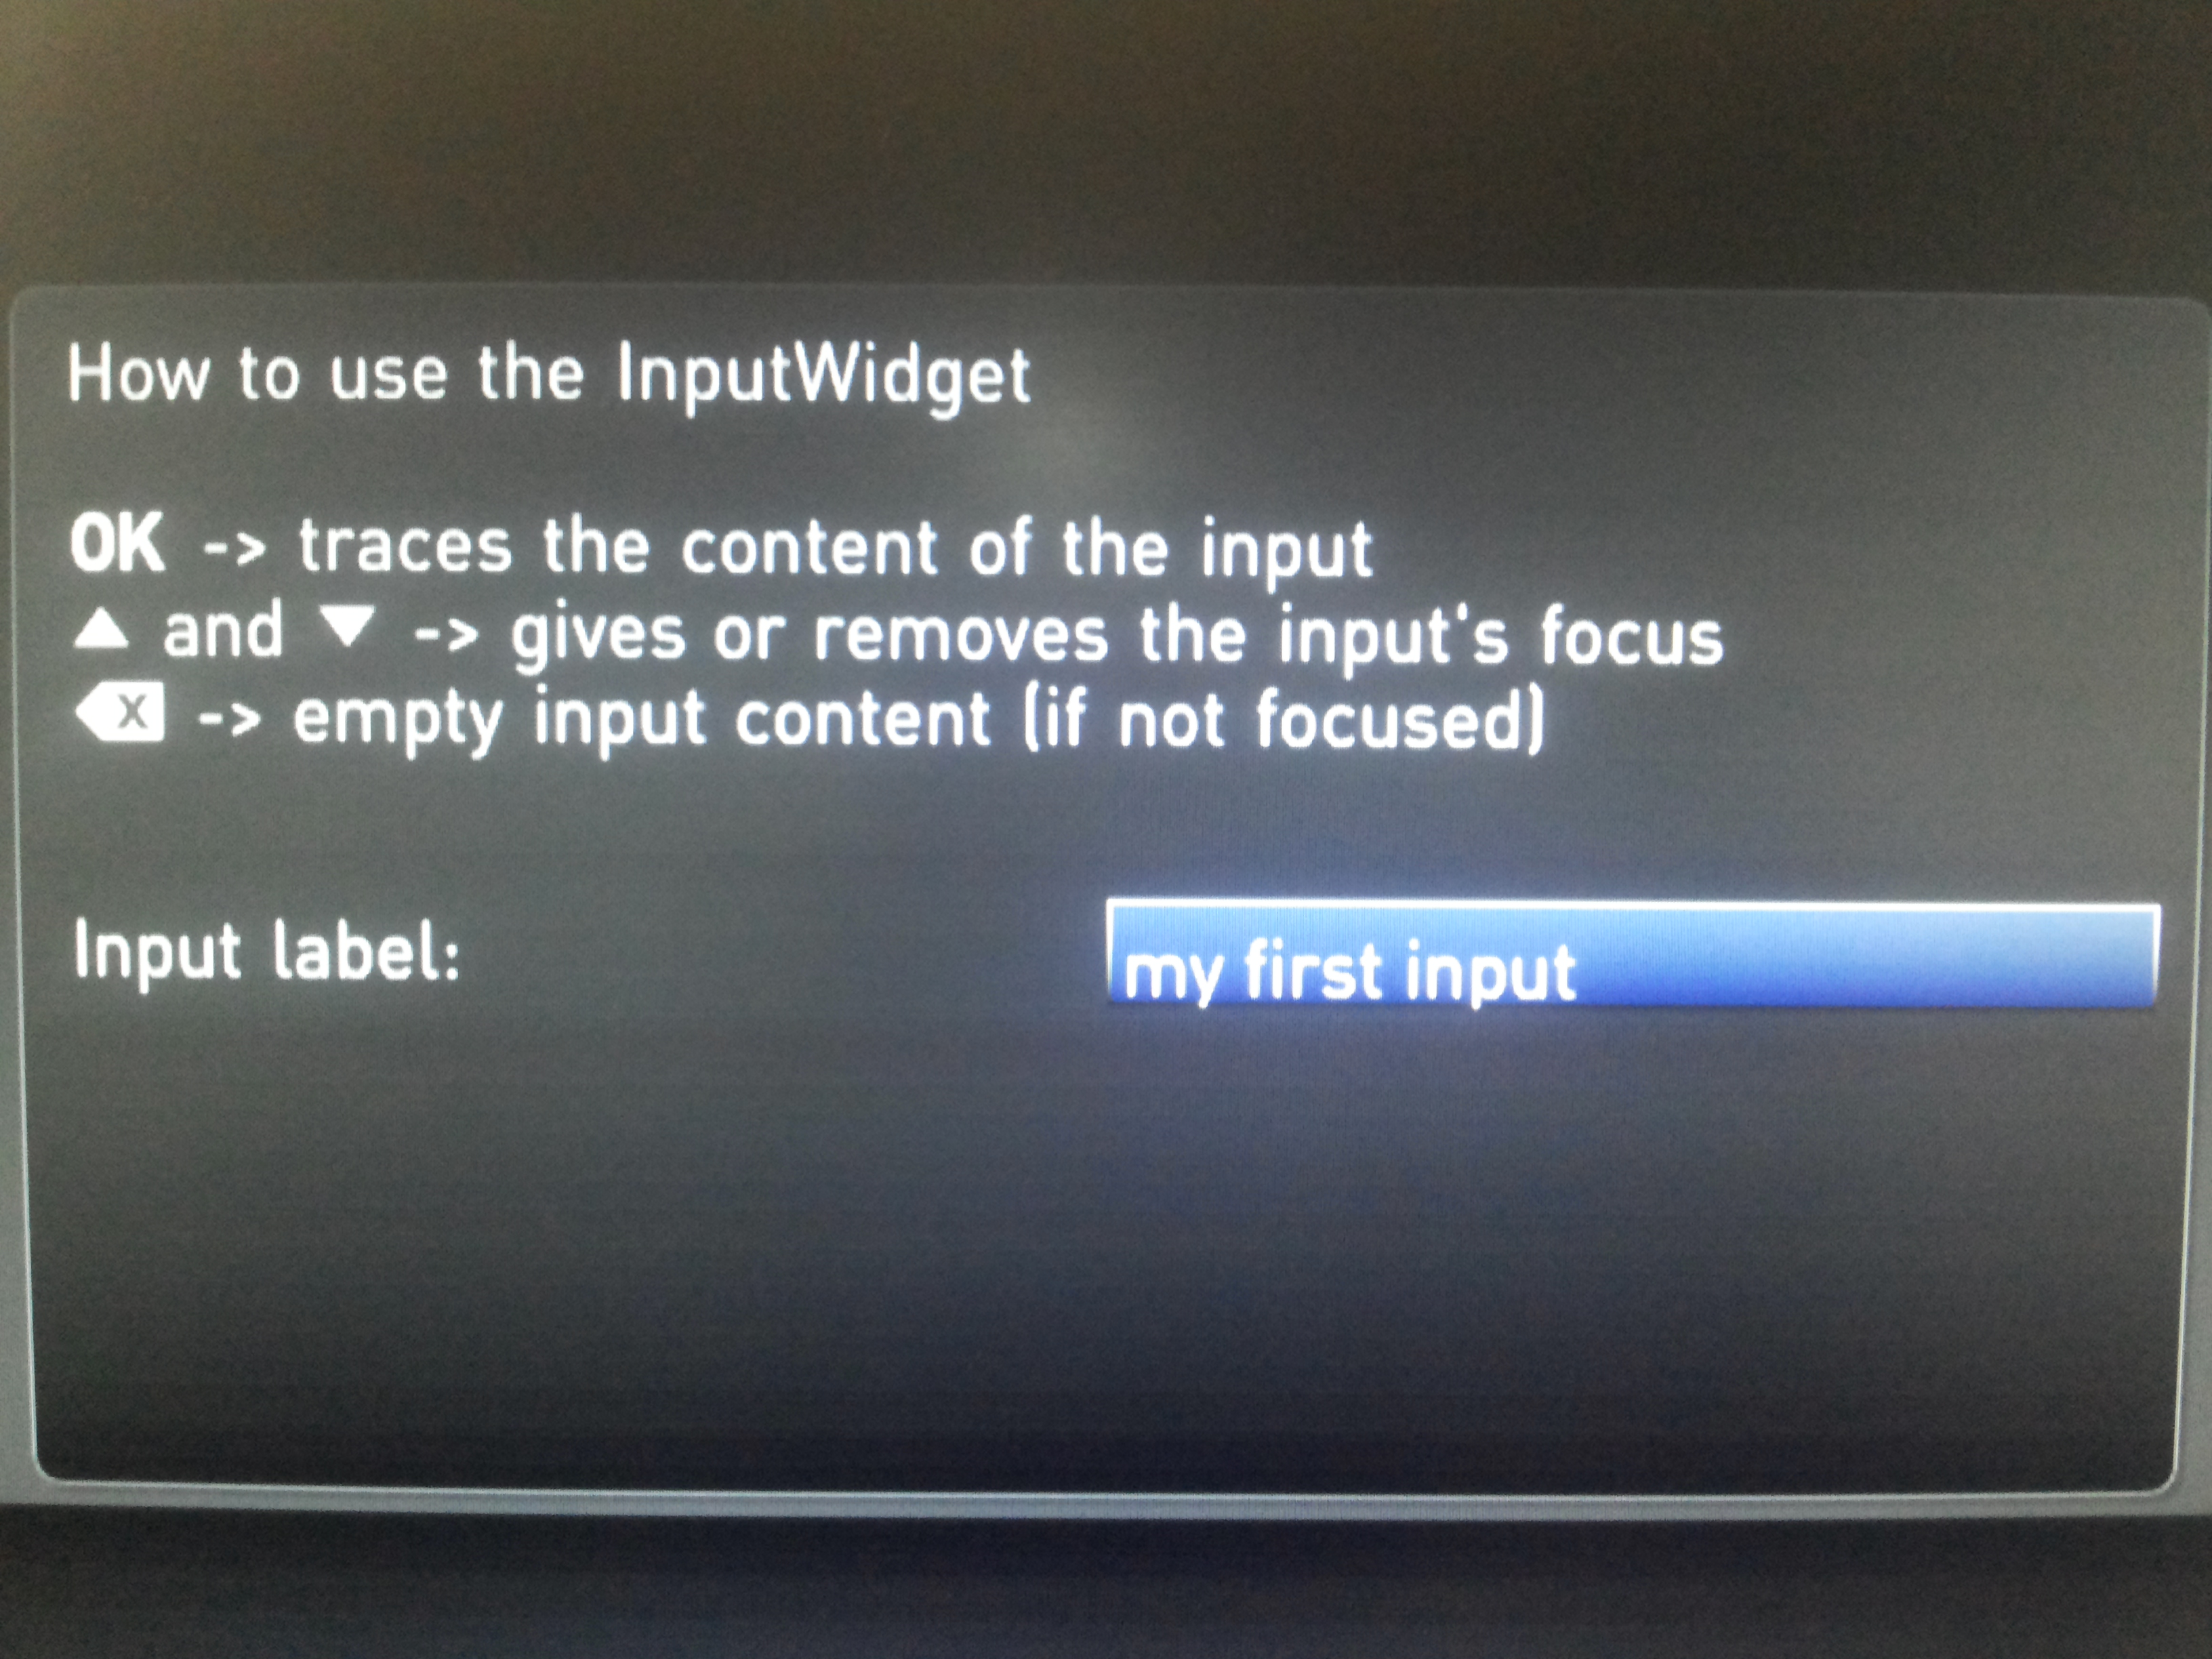
infoData.push('How to use the InputWidget');
infoData.push('v -> traces the content of the input');
infoData.push('< -> empty input content (if not focused)');
infoPanel.setData(infoData.join(''));
There is setdata() method is used to set the data on the widget. Input.setData(“Hello ,my first input”) Input.stateChange(“enter”); For changing the state of widget ,stateChange(“”) method is used. for showing the widget stateChange(“enter”) is used. for exit the widget stateChange(“exit”) is used. We have to handle the after taking input. By using enterkey or ok We used to getData() method to get the data and return true, and copy the following code in MyFormWidget.js
MyFormWidget.prototype.onKeyPress = function onKeyPress(_key)
{
    NGM.trace("myForm received a key: " + _key);
    var input = this.widgets.input;

case 'KEY_IRENTER':

            NGM.trace('Input data: ' + input.getData());
            return true;

			case 'KEY_UP':
        case 'KEY_DOWN':
            if (this._inputHasFocus) {
                // remove the focus
                input.setFocus(false);
                this._inputHasFocus = false;
            } else {
                // give the focus
                input.setFocus(true);
                this._inputHasFocus = true;
            }
            return true;
Shown below is the overview of the Display Screen.
infopanelDraw() method is used to draw the infopanel to set the text,value. We use to json for the widget showing in Netgem. Infopanel json created in canvas widget and their some Attribute. and copy the following code in MyFormWidget.json
 {
    "widgets":
{
  "infoPanel": {
            "create": "CanvasWidget",
            "param": {
                "w": 640,
                "h": 360,
                "speed": 300,
                "zIndex": 1,
                "defaultState": "exit",
                "bounds": {"x": 320, "y": 180},
                "draw": "infoPanelDraw"
            }
        },

        "input": {
            "create": "InputWidget",
            "param": {
                "w": 300,
                "h": 30,
                "speed": 300,
                "zIndex": 3,// it show above the infopanel
                "bounds": { "x": 640, "y": 360 },
                //"maxLength": 16,//max character of input widget
                "delay": 1000,
                "key": ["default"],
                "scrollList": [6, 100, 50, 150]
            }
        }


		 "inputLabel": {
            "create": "CanvasWidget",
            "param": {
                "w": 300,
                "h": 30,
                "speed": 300,
                "zIndex": 3,
                "defaultState": "exit",
                "bounds": { "x": 320, "y": 360 },
                "draw": "drawInputLabel"
            }
        },
		}
		}
Thanks
Gaurav Tiwari


Cookies are important to the proper functioning of a site. To improve your experience, we use cookies to remember log-in details and provide secure log-in, collect statistics to optimize site functionality, and deliver content tailored to your interests. Click Agree and Proceed to accept cookies and go directly to the site or click on View Cookie Settings to see detailed descriptions of the types of cookies and choose whether to accept certain cookies while on the site.


About Author
Gaurav Tiwari
Gaurav is a bright Java and Grails developer and have worked on development of various SaaS applications using Grails framework.