Creating Twitter Bot with Nodejs
Posted By : Satish Joshi | 28-Dec-2018

What is Twitter Bot :
It is typically an application which helps to retweet, favorites, on the basis of hashtags and replies to other users if they follow it. In our case, we'll be listening for someone to tweet with a certain hashtag and then retweet something when that happens.
Prerequisites :
1. We need Node.js and familiar with javascript
2. You need a Twitter Account
3. Should be familiar with command-line tools for your operating system.
4. A valid phone number that you can verify via SMS
Installation Process :
Go to the Node.js website and download the LTS (long-term support) option according to the OS support. After it downloaded, run the installer process until the end.
It will also install the NPM for you. To confirm that you have installed the process properly, open Command Prompt (For Windows) or Terminal (For Linux, Mac). Run the following commands - node -v and npm -v.
Initialize the project and Install twit module :
Create a folder and inside that folder initialize it with npm init command. Once that is complete, you should see package.json and to simplify our interactions with the powerful Twitter API, we will install twit named module using npm install twit --save.
Creating a Twitter App :
First create or log in to your twitter account, ensure you have verified mobile number as Twitter requires this to register any new applications. After the verification process, head on over to the Twitter Application page (https://developer.twitter.com/en/apps) to start creating a new Twitter application. You need to fill all the details so that you can proceed with this page -
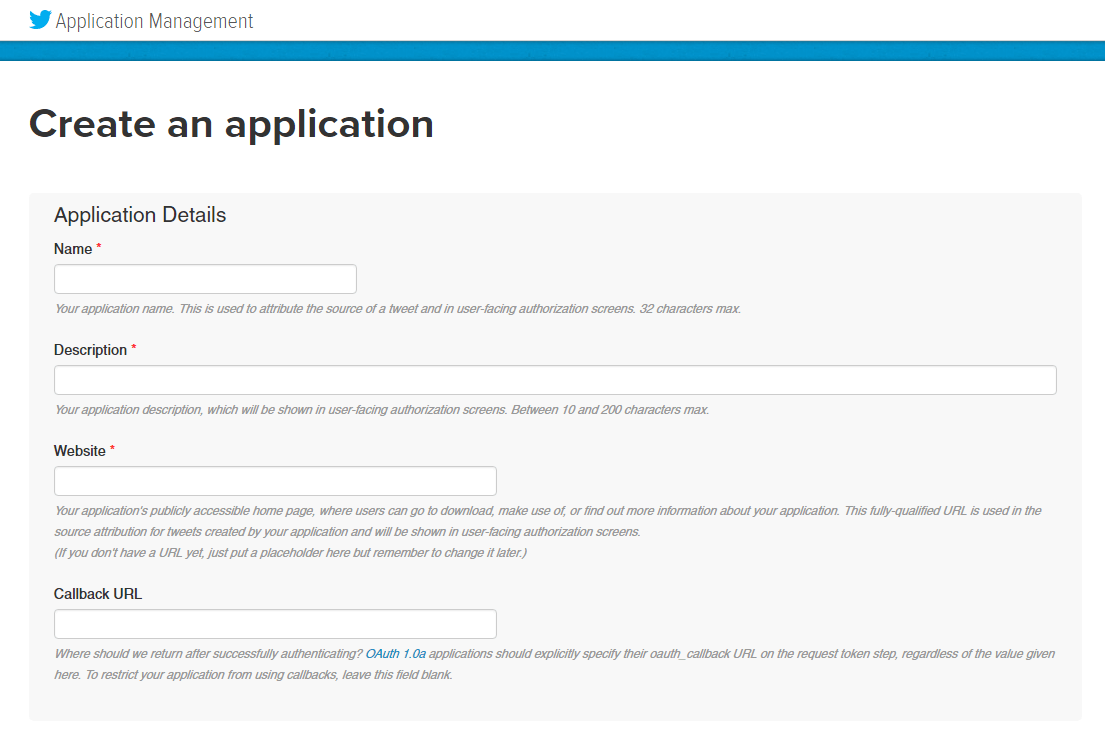
After that give your application a name, description, website (it can be anything really), check the checkbox, and hit "Create your Twitter Application". Once created, head to your bot from this page (https://developer.twitter.com/en/apps) and then click on the tab that says "Keys and Access Tokens".
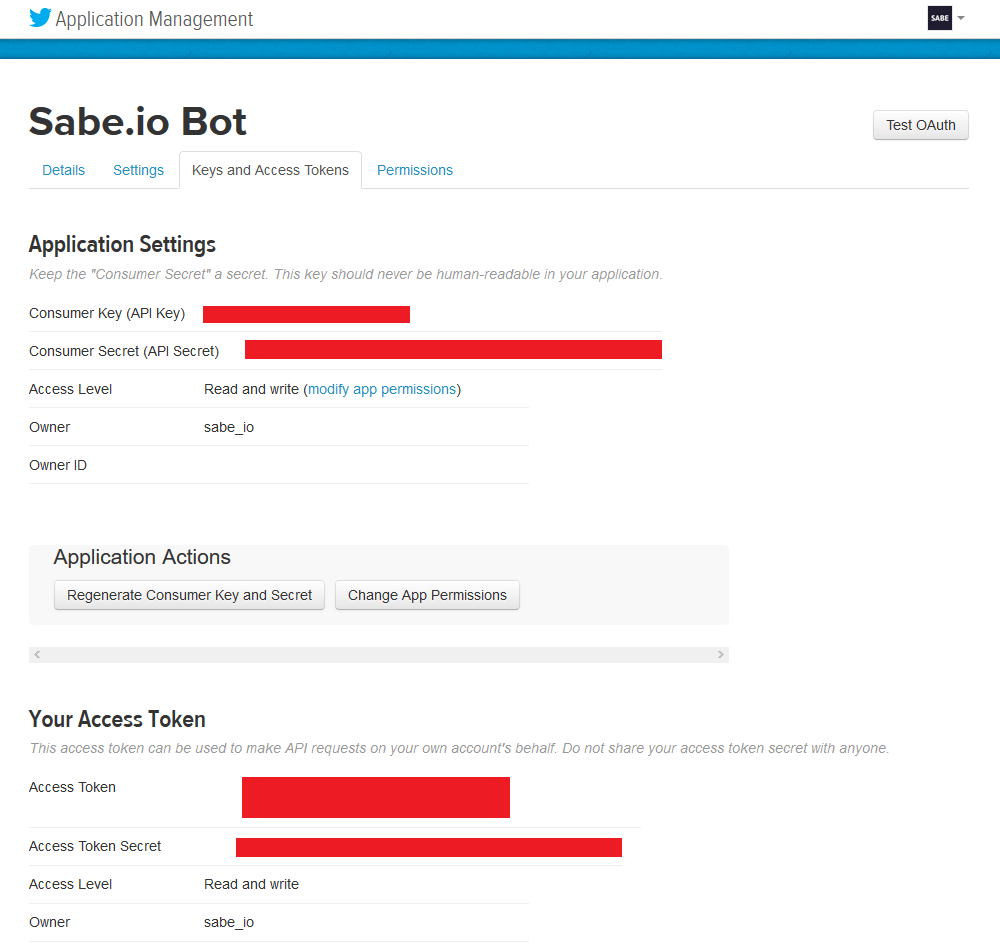
On this page you can get the 4 things you need for your bot:
- Consumer Key/API Key
- Consumer Secret/API Secret
- Access Token
- Access Token Secret
With all the information you need from Twitter on-hand and must agree to the Developer Agreement. After that, we can begin coding!
Starting the Bot :
Create a file index.js (As you can keep any name), import the twit module and then initialize an instance of it by calling the constructor for it and passing in the credentials you obtained earlier -
Example :
// Importing twit module
var Twit = require('twit')

// Passing the Twitter API credentials to the constructor
    var T = new Twit({
        consumer_key: '',
        consumer_secret: '',
        access_token: '',
        access_token_secret: ''
    })

// It will authenticate the twit credentials whether it's valid or not and streams for filtering the events.
    T.get('account/verify_credentials', {
        include_entities: false,
        skip_status: true,
        include_email: false
    }, onAuthenticated)

    function onAuthenticated(err, res) {
        if (err) {
            throw err
        }

        console.log('Authentication successful. Running bot...\r\n')

// Here we are connecting to user endpoint because this event will only affect as a user for which we made for this example.
        var stream = T.stream('user')

        // Here we want to listen for is the follow event and attached the listeners
        stream.on('follow', onFollowed)
        stream.on('error', onError)
    }

// When a follow event triggers, it fires the onFollowed function. Inside it, we extract the information that we know we will need which is the user's name and screen name, or Twitter handle.
    function onFollowed(event) {
        var eventName = event.source.name
        var eventScreenName = event.source.screen_name
        var response = '@' + eventScreenName + ' Thank you for following, ' + eventName + '!'

// We just have to call the post method on the event statuses/update on our twit instance, tell it what we want to post (in this case, a tweet/status).
        T.post('statuses/update', {
            status: response
        }, onTweeted)

        // tweet response to user here

        console.log('I was followed by :  ' + eventName + ' @' + eventScreenName)
    }

    function onError(error) {
        throw error
    }

// Now that we have told twit to tweet out our response, we just to need to define the  onTweeted callback function and our bot is complete
    function onTweeted(err, reply) {
        if (err !== undefined) {
            console.log(err)
        } else {
            console.log('Tweeted: ' + reply.text)
        }
    }
Start the Bot using npm start or node index.js command and want to know about statuses/update, you can refer to https://developer.twitter.com/en/docs/tweets/post-and-engage/api-reference/post-statuses-update.
In the above example, we have used Streams API of Twitter, we can let Twitter do the filtering of events for us, and then only do something when an event that we care about does occur. Here these all are the endpoints you could connect to:
- statuses/filter
- statuses/sample
- statuses/firehose
- user
- site
Conclusion :
In this Blog, we have seen how we can use Node.js and the twit module to create a simple Twitter bot that automatically responds to users that follow an account. We can do much more than simply tweet out, including retweeting and liking other tweets. You can refer more about this module at - https://www.npmjs.com/package/twit.
References :
- https://sabe.io/tutorials/creating-twitter-bot-node-js
- http://techknights.org/workshops/nodejs-twitterbot/
Thanks for reading and Let me know if any Suggestions!


Cookies are important to the proper functioning of a site. To improve your experience, we use cookies to remember log-in details and provide secure log-in, collect statistics to optimize site functionality, and deliver content tailored to your interests. Click Agree and Proceed to accept cookies and go directly to the site or click on View Cookie Settings to see detailed descriptions of the types of cookies and choose whether to accept certain cookies while on the site.


About Author
Satish Joshi
Satish has experience on web development believes in hard work and dedication. He is friendly and an honest person.