Tutorial To Learn ARKit: Part I
Posted By : Aditya Kumar Sharma | 06-Mar-2018
Let's make a sample augmented reality mobile application featuring a UFO which we can move in all directions.
Step 1: Create a project.
Launch Xcode and create a Single View Application project.
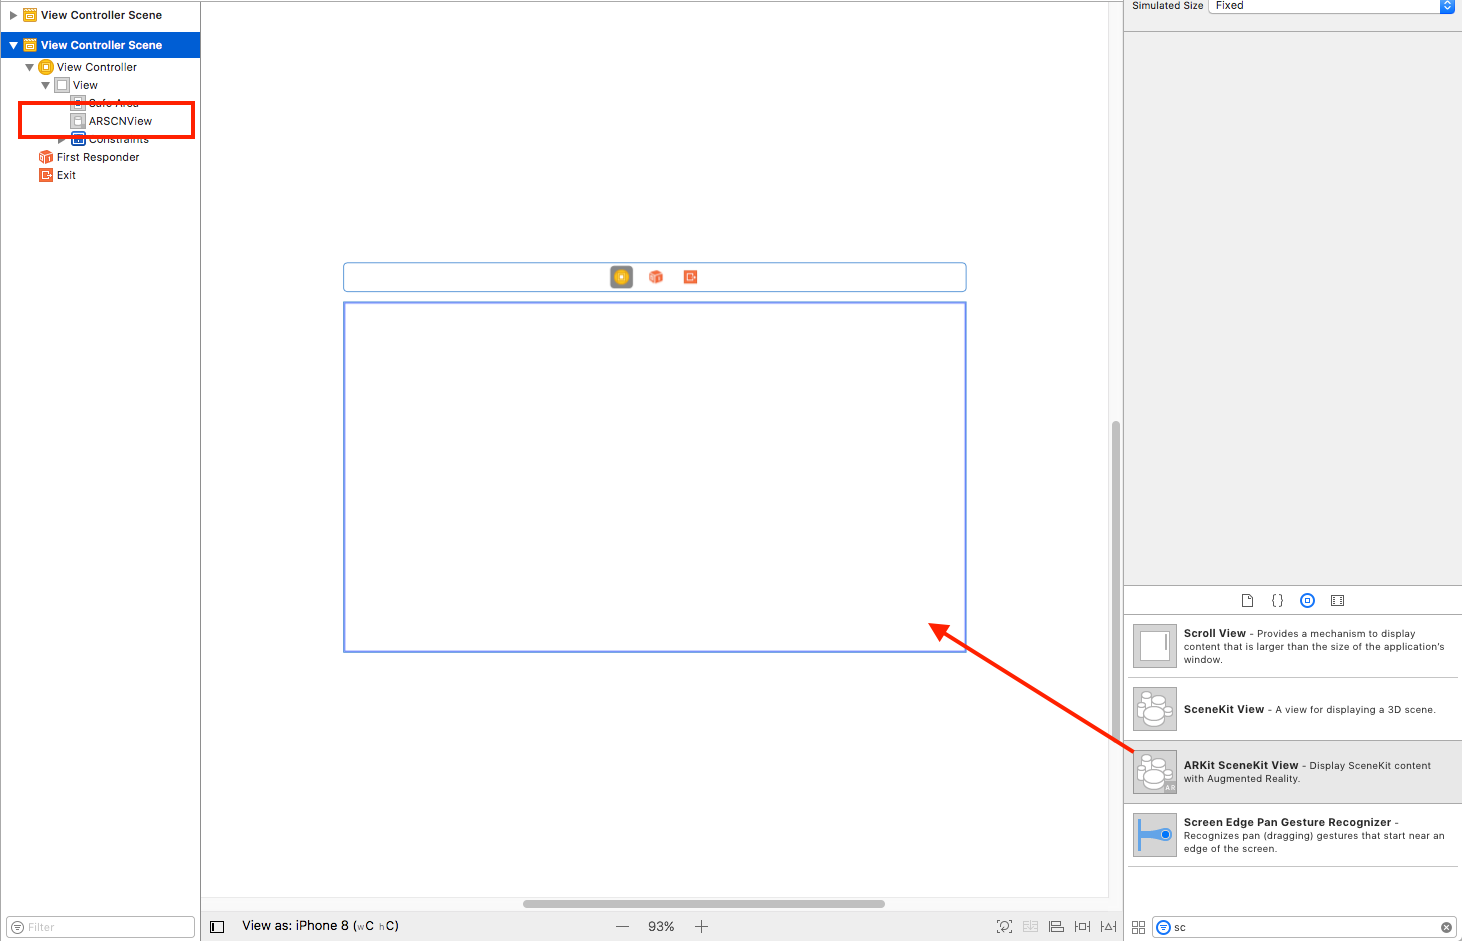
Step 2: Add ARKit SceneKit View
Open Storyboard and add ARKit SceneKit View to the view. It displays the virtual 3D content on a camera background.
Add outlet of SceneKit View in the View Controller.
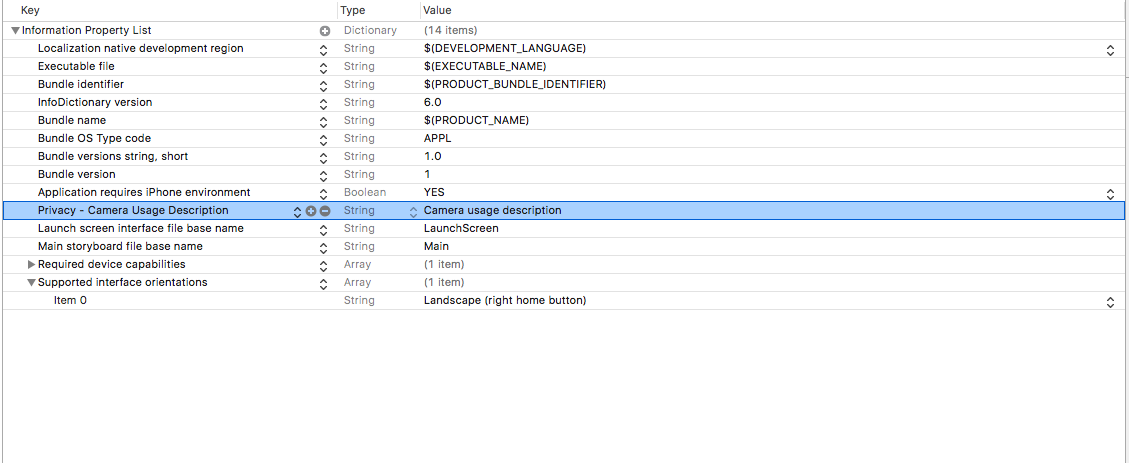
Step 3: Enable Camera
In ARKit, each session has a scene to render virtual objects. So for rendering ARKit needs iOS device sensors like camera, accelerometer, gyroscope.
Please add Camera permission in the .plist file
All virtual objects are rendered relative to their position and orientation with camera in ARKit. AR mobile application needs a camera, So we have to setup scene in viewDidLoad and session in the viewWillAppear.
 override func viewDidLoad() {

       super.viewDidLoad()

       setupScene()

   }


   override func viewWillAppear(_ animated: Bool) {

       super.viewWillAppear(animated)


       setupConfiguration()

   }


   func setupScene() {

       let scene = SCNScene()

       sceneView.scene = scene

   }


   func setupConfiguration() {

       let configuration = ARWorldTrackingConfiguration()

       sceneView.session.run(configuration)

   }
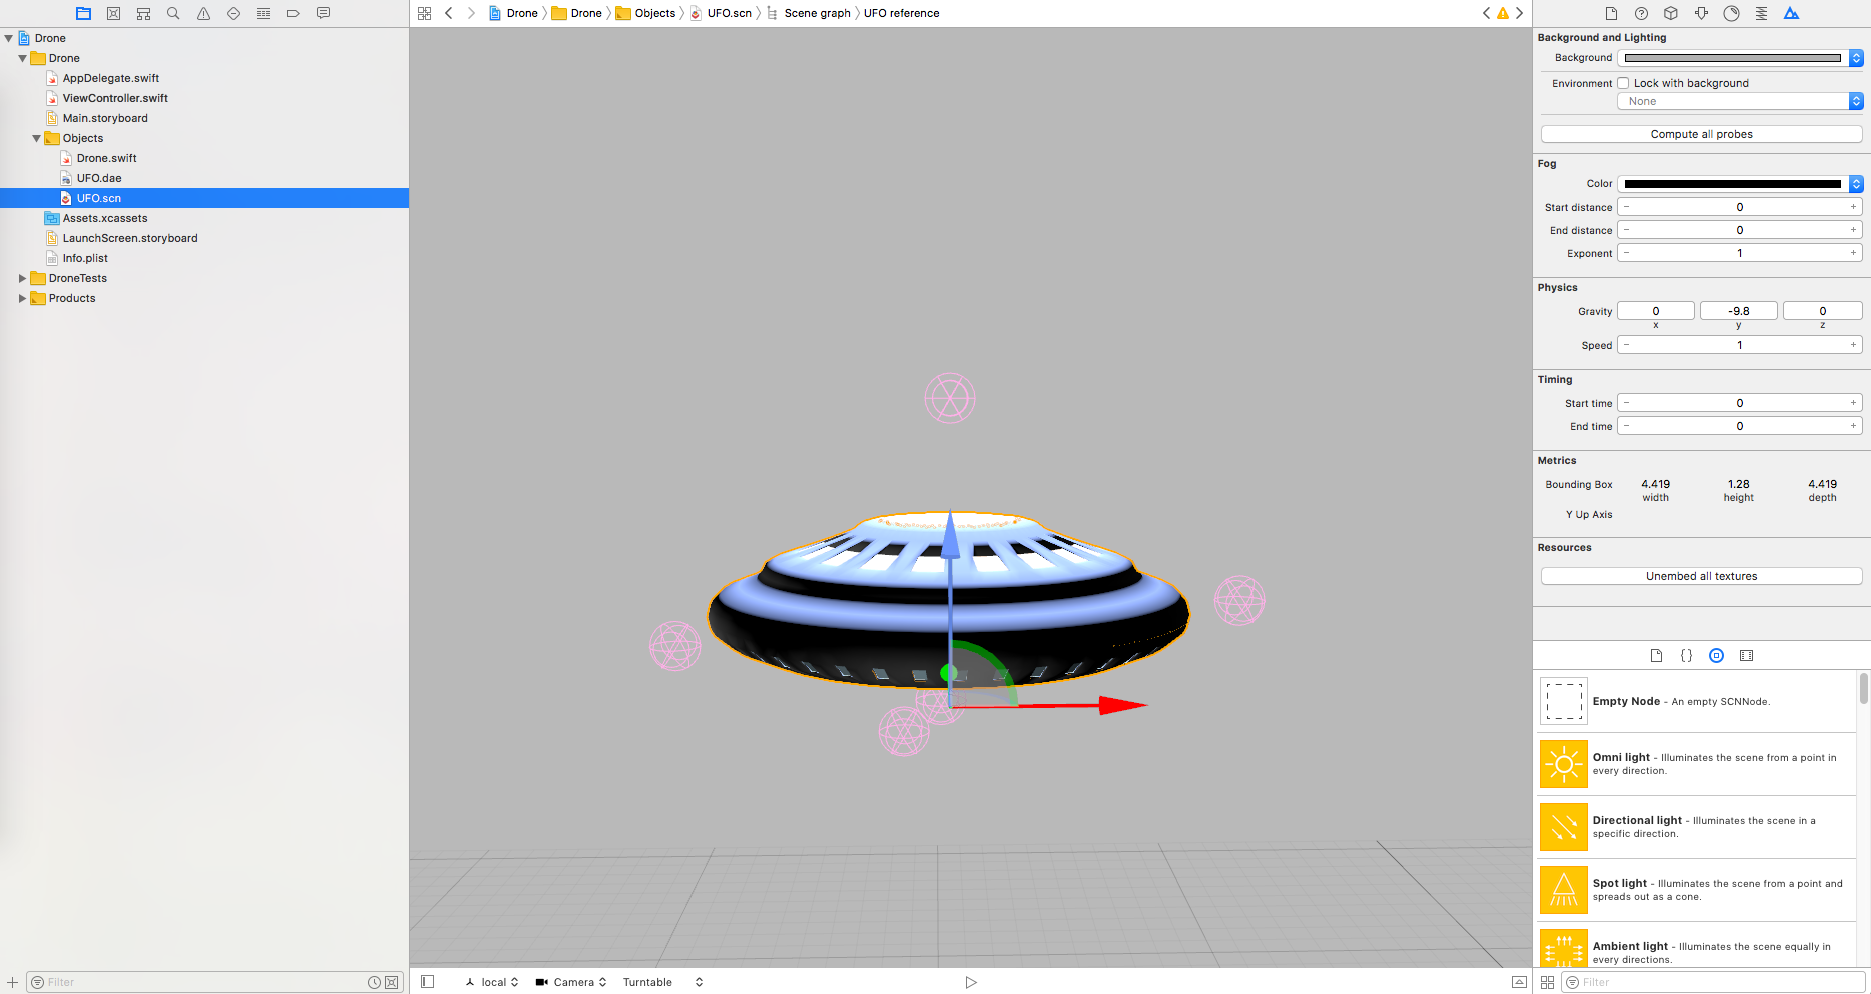
Step 4: Add 3D Object
We can any virtual object to our augmented reality applications. ARKit SceneKit View supports several formats like: .dae, .scn, .abc.
If we are having .dae file we need to import that object file in the project. After importing we need to create SceneKit Scene File and name it. As it gets appears in the navigator drawer. Open UFO.scn file which is currently empty.
Now we have to drag UFO.dae file to the UFO.scn file and you will see that 3D object appears in the .scn file. Please take note- Don’t delete the .dae file.
Step 5: Display the 3D Object
As we have already added a 3D object in the project. Now its time to show that object on the application.
3D Object is been shown as a subclass of the SCNNode. So we must a node to the view to present the object on the application. For this now we will be creating a class and will load the initial file containing the object.
   class Object3D: SCNNode {

   func loadModel() {

       guard let virtualObjectScene = SCNScene(named: "UFO.scn") else { return }

       let wrapperNode = SCNNode()

       for child in virtualObjectScene.rootNode.childNodes {

           wrapperNode.addChildNode(child)

       }

       addChildNode(wrapperNode)

   }

}
Now we will initialize the object of the Object3D and add it after configuration.
   func add3DObject() {

       object.loadModel()

       sceneView.scene.rootNode.addChildNode(object)

   }
Now call “add3DObject” from viewWillAppear after configuration:
   override func viewWillAppear(_ animated: Bool) {

       super.viewWillAppear(animated)


       setupConfiguration()

       add3DObject()

   }
Now run the augmented reality application and we’ll find the object on display screen.
For proceeding further, please open Part 2.


Cookies are important to the proper functioning of a site. To improve your experience, we use cookies to remember log-in details and provide secure log-in, collect statistics to optimize site functionality, and deliver content tailored to your interests. Click Agree and Proceed to accept cookies and go directly to the site or click on View Cookie Settings to see detailed descriptions of the types of cookies and choose whether to accept certain cookies while on the site.


About Author
Aditya Kumar Sharma
Aditya is a bright iOS developer, have knowledge of objective C, swift, swift 3, JSON, Core data and iPhone development. Apart from that he loves to travel and explore new things.