Push Notifications using Google Cloud Messaging GCM in Android Part I
Posted By : Varun Sharma | 25-Jul-2012
Android has replaced C2DM (Cloud to Device Messaging) service with GCM (Google Cloud Messaging).
I have used Google Cloud Messaging (GCM) in one of my projects to send notifications to Android device. I decided to write this blog so that others can use GCM (before C2DM) in Android, with ease in their projects.
I have used Both Server Side (Grails) & Client Side (Titanium) to send notifications to the android device. So, I will be explaining you both one by one. But before that you need to add ADT plugin in to your Grails framework.
Add ADT Plugin in Grails
1. Start Grails, then select Help > Install New Software...
2. Click Add, in the top-right corner.
3. In the Add Repository dialog that appears, enter "ADT Plugin" for the Name and the following URL for the Location: https://dl-ssl.google.com/android/eclipse/
4. Click OK
Note: If you have trouble acquiring the plugin, try using "http" in the Location URL, instead of "https" (https is preferred for security reasons).
5. In the Available Software dialog, select the checkbox next to Developer Tools and click Next.
6. In the next window, you'll see a list of the tools to be downloaded. Click Next.
7. Read and accept the license agreements, then click Finish.
Note: If you get a security warning saying that the authenticity or validity of the software can't be established, click OK
8. When the installation completes, restart Grails.
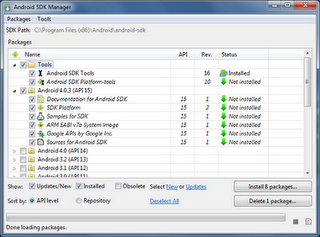
Note: You need Android SDK
1. First you need to download the Android SDK
2. Your download package is a .tgz. Unpack it to a safe location on your machine. By default, the SDK files are unpacked into a directory named android-sdk-linux_x86.
Configuring ADT Plugin
After you've installed ADT and restarted Grails, you must specify the location of your Android SDK directory:
1. Select Window > Preferences... to open the Preferences panel (on Mac OS X, select Eclipse > Preferences)
2. Select Android from the left panel.
You may see a dialog asking whether you want to send usage statistics to Google. If so, make your choice and click Proceed.
3. For the SDK Location in the main panel, click Browse... and locate your downloaded Android SDK directory (such as android-sdk-linux_x86).
4. Click Apply,then OK.
If you haven't encountered any errors, you're done setting up ADT.
Now As you have sucessfully added the ADT plugin & Android SDK, you are all set up to go for Server Side & Client Side development.
How to Register Android Device for GCM & How to send notifications to device from server will be discussed in Next Part.
Push Notifications using Google Cloud Messaging (GCM) in Android (Part 2)
Hope it helps !
Varun Sharma
[email protected]


Cookies are important to the proper functioning of a site. To improve your experience, we use cookies to remember log-in details and provide secure log-in, collect statistics to optimize site functionality, and deliver content tailored to your interests. Click Agree and Proceed to accept cookies and go directly to the site or click on View Cookie Settings to see detailed descriptions of the types of cookies and choose whether to accept certain cookies while on the site.


About Author
Varun Sharma
Varun is an experienced Groovy and Grails developer and has worked extensively on designing and developing applications with FaceBook , Linkedin and Twitter integrations using Grails technologies. Varun loves painting and photography.